I have a Lenovo ThinkStation P3 Tiny that serves as my starter homelab machine. It’s compact but decently powered with:
- 2 NICs with 5 ports
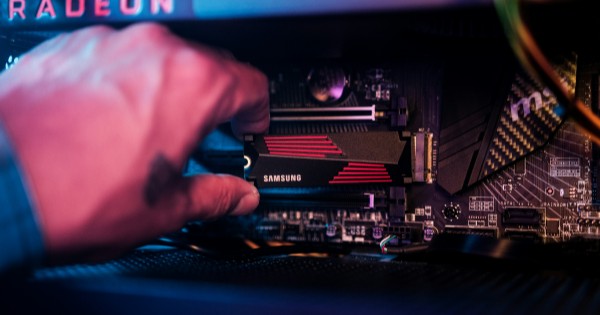
- 1TB SSD
- 16GB DDR5 RAM
I initially installed Proxmox VE (PVE) using ZFS as the file system by selecting RAID0, thinking its features like snapshots and data integrity would be beneficial. However, I soon realized it was a big mistake. ZFS is incredibly RAM-hungry, and with only 16GB of RAM, my homelab couldn’t handle many VMs and services running simultaneously.
My Initial Setup
- PVE on ZFS using RAID0
- pfSense VM for firewall management
- Proxmox Backup Server (PBS)
- Ubuntu Server VM running Docker and Portainer
While I had grand plans for more services, the ZFS overhead severely limited my system’s capabilities. I decided to reinstall PVE using EXT4 to free up RAM and streamline performance.
Why Switch from ZFS to EXT4?
- Lower RAM Usage: ZFS consumes a lot of RAM. Switching to EXT4 would free up more memory for VMs.
- Better Performance: On a single SSD setup, ZFS’s advantages are less impactful, while EXT4 offers better general performance.
- Simplicity: Managing ZFS’s tuning and overhead added unnecessary complexity to my homelab.
While Btrfs was an alternative, I opted for the tried-and-true EXT4 with LVM-Thin for flexibility and snapshots.
The Reinstallation Journey: Step-by-Step
1. Initial Reinstallation Attempt
I popped in my old PVE USB installer and went for a fresh install. That’s when the problems started:
- Error Message:
“Failed to prepare EFI boot using grub on ‘/dev/nvme0n1p2’. Unable to install the EFI bootloader. Warning: Please specify –no-rename explicitly.”
I was stuck.
2. Finding the Right Terminal Access
Getting to a working command prompt was tricky. I finally booted the PVE installer in debug mode and accessed a terminal with root@proxmox. This terminal actually worked, unlike the post-install terminal (Ctrl + Alt + F3), which threw errors like:
“System has not been booted with systemd.”
3. Troubleshooting Attempts
Here’s a chronological breakdown of everything I tried before finding the real solution:
- Tried installing Linux Mint: The installation failed.
- Re-downloaded PVE ISO: Thought the issue might be the ISO. It wasn’t.
- USB Installer Issues: I used Rufus to create the bootable USB, and while it defaulted to GPT, that wasn’t the root cause. The installer was fine.
- Debated sticking with ZFS: I quickly abandoned that thought.
- Boot Settings Adjustments: I explored various BIOS settings.
- Legacy BIOS Mode: I considered switching to Legacy mode but couldn’t find the option in BIOS on this new machine.
- Secure Disk Wipe: Performed a secure wipe from BIOS—installation still failed.
- EFI Variables Cleanup: Tried deleting EFI variables to clean out EFI dump files but found nothing useful.
- Checked EFI Vars Storage: Ran
df -h /sys/firmware/efi/efivars:Filesystem: efivars | Size: 192K | Used: 191K | Avail: 0 | Use%: 100%
4. Hardware Troubleshooting
Out of desperation, I followed Lenovo’s Hardware Maintenance Manual to open up the ThinkStation P3 Tiny:
- Located the fan and CMOS battery underneath.
- Removed and reinserted the CMOS battery for a hard reset.
While this was a great hardware learning experience, it didn’t fix the installation issue.
5. The Breakthrough: BIOS Reset
Finally, I decided to reset the BIOS to factory settings. This did the trick! After the reset, I no longer faced EFI bootloader errors, and the installer proceeded.
Manual Partitioning with fdisk
After the BIOS reset, I manually partitioned the SSD using fdisk:
Deleted Old Partitions:
sudo fdisk /dev/nvme0n1
d  # Delete partition 1
d  # Delete partition 2
d  # Delete partition 3
Created New Partitions:
EFI Partition:
n  # New partition
Partition type: EFI (code ef)
First sector: default
Last sector: +512M
Linux Root Partition:
n  # New partition
Partition type: Linux LVM (code dont remember)
Use the remaining space
Verify Partitions with
lsblk:lsblknvme0n1p1: EFI partitionnvme0n1p2: Linux LVM (not mounted initially)
Format Partitions:
sudo mkfs.fat -F32 /dev/nvme0n1p1  # EFI Partition
sudo mkfs.ext4 /dev/nvme0n1p2      # Root Partition
LVM Configuration
Since the root partition was set to LVM, I proceeded to configure it:
Scan for Physical Volumes:
sudo pvscanDisplay Volume Groups:
sudo vgdisplay- Found volume group
pve.
- Found volume group
Logical Volume Check:
sudo lvdisplay- Initially, no logical volumes were listed.
Rescanning:
sudo lvscan
After confirming the LVM setup, I re-ran the PVE installation, and this time, it completed successfully!
Final Steps
After the successful installation, I powered down the system:
sudo shutdown now
I took a much-needed break after a long night of troubleshooting. With everything documented here, I’m now ready to rebuild my homelab services and VMs on this lean, EXT4-based setup.
Conclusion
This was an intense troubleshooting journey, but it’s a testament to the complexity of homelab setups and how patience and methodical steps can resolve even the most frustrating issues. I hope this documentation helps me (and maybe others) in future homelab adventures!
Now, time to get back to building out my VMs and services. Onward!