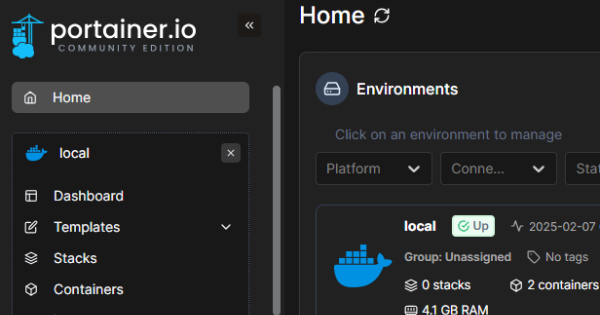
Ubuntu Docker Portatiner Guide
In this comprehensive guide, we’ll walk through the steps to set up an Ubuntu Server VM, configure networking with pfSense, and install Docker and Portainer for container management. We’ll also highlight issues encountered during the setup process and how they were resolved.
Table of Contents
- Creating the VM in Proxmox
- Network Configuration with pfSense
- Installing Ubuntu Server
- Setting Static IP Address
- Installing Docker
- Installing Portainer
- Troubleshooting and Issues Encountered
- Backing Up the VM Using Proxmox Backup Server
1. Creating the VM in Proxmox
VM Configuration:
General:
- Name: docker
OS:
- ISO Image: Select Ubuntu Server ISO
System:
- Machine: Q35
- BIOS: UEFI
- Add EFI Disk: Checked
- EFI Storage: local-lvm
- Pre-Enroll Keys: Unchecked
- QEMU Agent: Checked
- SCSI Controller: VirtIO SCSI Single
Disks:
- VirtIO0 (OS Disk):
- Bus/Device: VirtIO Block
- Storage: local-lvm
- Disk Size: 64GB (Future-proofed for OS, updates, and Docker overhead)
- Discard: Enabled (Allows TRIM for SSD lifespan and performance)
- SCSI0 (Persistent Storage):
- Bus/Device: SCSI
- Storage: local-lvm
- Disk Size: 100GB (For Docker volumes, databases, and additional services)
- Discard: Enabled
CPU:
- Cores: 2 (Starter config for basic services, can be increased later)
- Type: Host
Memory:
- Memory: 2GB (Sufficient for a start, scalable later)
- Ballooning: Checked
Network:
- Bridge: vmbr1 (Connected to VLAN)
- Model: VirtIO (paravirtualized)
- Static IP: Set (Recommended for Pi-hole and Home Assistant)
- Firewall: Checked (Managed via pfSense, but can add VM-level rules if needed)
Confirm:
Review settings and complete VM creation. 🚀
2. Network Configuration with pfSense
Setting Up VMLAN:
- Interface Assignments:
- Go to Interfaces > Assignments in pfSense.
- Add a new interface and assign it to the virtual bridge created in Proxmox VE (vmbr1).
- Rename the interface to VMLAN.
- Configuring VMLAN:
- Go to Interfaces > VMLAN.
- Enable the interface.
- Set the IPv4 Configuration Type to Static IPv4.
- Set the IPv4 Address to
10.0.1.1/24. - Save and apply the settings.
- DHCP Server Configuration:
- Navigate to Services > DHCP Server > VMLAN.
- Enable the DHCP server.
- Set the DHCP range, e.g.,
10.0.1.100to10.0.1.200. - Save and apply the settings.
- Firewall Rules:
- Go to Firewall > Rules > VMLAN.
- Add a new rule:
- Action: Pass
- Protocol: Any
- Source: VMLAN net
- Destination: Any
- Save and apply the rule.
With these steps, the VM connected to vmbr1 will get an IP in the 10.0.1.x range and have full network access.
3. Installing Ubuntu Server
- Boot the VM using the Ubuntu Server ISO.
- Proceed with the installation and select “Use entire disk” when prompted.
- Install the OpenSSH Server when prompted.
- Complete the installation and reboot.
Issue Encountered:
- Mirror URL Check Failure:
- During installation, the mirror URL check failed but we continued without issues.
- CD-ROM Unmounting Error:
- On reboot, an error about unmounting
cdrom.mountappeared, but it didn’t affect the installation.
- On reboot, an error about unmounting
4. Setting Static IP Address
Disabling Cloud-Init Network Configuration:
- Create a file to disable cloud-init network settings:
1
sudo nano /etc/cloud/cloud.cfg.d/99-disable-network-config.cfg
Add the following content:
1
network: {config: disabled}
- Edit the Netplan configuration:
1
sudo nano /etc/netplan/50-cloud-init.yaml
Replace with:
1
2
3
4
5
6
7
8
9
10
network:
  version: 2
  ethernets:
    enp6s18:
      dhcp4: no
      addresses:
        - 10.0.1.2/24
      gateway4: 10.0.1.1
      nameservers:
        addresses: [8.8.8.8, 8.8.4.4]
- Apply the configuration:
1
sudo netplan apply
Issue Encountered:
- Deprecated
gateway4Warning:- Netplan displayed warnings about
gateway4being deprecated but functioned correctly.
- Netplan displayed warnings about
- SSH Disconnection:
- Applying Netplan caused an SSH disconnection. Reconnected using the new static IP
10.0.1.2.
- Applying Netplan caused an SSH disconnection. Reconnected using the new static IP
5. Installing Docker
- Update packages:
1
sudo apt update && sudo apt dist-upgrade -y
- Install Docker:
1
sudo apt install -y docker.io
- Enable Docker to start on boot:
1
sudo systemctl enable docker
- Test Docker installation:
1
sudo docker run hello-world
- Add user to Docker group (optional):
1
sudo usermod -aG docker $USER
Log out and back in to apply group changes.
6. Installing Portainer
- Pull and run Portainer with HTTPS:
1
2
3
4
sudo docker run -d -p 9443:9443 --name=portainer --restart=always \
-v /var/run/docker.sock:/var/run/docker.sock \
-v /opt/portainer/data:/data \
portainer/portainer-ce:latest --ssl
- Access Portainer GUI:
- Visit
https://10.0.1.2:9443in your browser. - Set up the initial admin account.
- Visit
Issue Encountered:
- Container Name Conflict:
- Received an error about the container name already being in use due to the previous container created using the http protocol. Resolved by removing the existing container:
1
sudo docker rm -f portainer
- Self-Signed Certificate Warning:
- Portainer uses a self-signed SSL certificate by default, similar to Proxmox VE.
7. Troubleshooting and Issues Encountered
- Proxmox Backup Size:
- Initial backups were only ~500 KB due to excluding the main VM disk (
backup=noin VM disk settings). - To include the VM’s disk in backups, ensure the backup option is enabled for the primary disk.
- Initial backups were only ~500 KB due to excluding the main VM disk (
8. Backing Up the VM Using Proxmox Backup Server
- Configure the VM to include disks in backup:
- In Proxmox, go to the VM settings.
- Edit the disk settings and enable the backup option.
- Manually do a backup job:
- Go to VM > Backup.
- Manually do a backup targeting your Proxmox Backup Server (PBS).
Conclusion
By following this guide, you’ve successfully set up an Ubuntu Server VM, configured networking with pfSense, installed Docker, and deployed Portainer for container management. With proper network configuration and troubleshooting, your system is now ready for scalable and secure containerized applications.
